
Spring door hinges are essential components for ensuring that doors close automatically and securely. Often used in commercial settings, these hinges are designed to provide convenience and safety. However, over time, adjustments may be necessary to maintain their efficiency. Understanding how to adjust adjustable spring door hinges can help keep your doors functioning properly. This article will explore the mechanics of spring-loaded door hinges and provide a step-by-step guide for making the necessary adjustments.
Adjustable Spring-Loaded Door Hinges
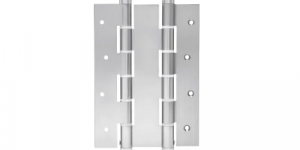
A spring loaded door hinge is a specialized type of hinge that incorporates a spring mechanism, allowing the door to close automatically after being opened. These hinges are commonly used in high-traffic areas, such as office buildings and public restrooms, where hands-free operation is advantageous. The tension in the spring can be adjusted, making adjustable spring door hinges a flexible solution for various door types.
The Importance of Proper Adjustment
Adjustable spring loaded hinges ensure that doors close securely, preventing drafts and enhancing security. If a door closes too quickly, it can be damaging to the door frame or pose a safety hazard. Conversely, if it closes too slowly, it may remain ajar, which can compromise security and energy efficiency. Regularly checking and adjusting these hinges is vital for optimal performance.
Tools Required for Adjustment
Before you begin adjusting your adjustable spring door hinges, gather the following tools:
- Screwdriver (usually a flathead or Phillips)
- Allen wrench (if applicable)
- Level
- Measuring tape
- Lubricant (optional)
Having these tools ready will streamline the adjustment process and help ensure accurate results.
Step-by-Step Adjustment Process
- Inspect the Hinges
Begin by inspecting the spring-loaded door hinges. Look for any signs of wear or damage, such as rust or misalignment. If the springs appear stretched or broken, it may be necessary to replace the hinges rather than adjust them.
- Identify Adjustment Points
Most adjustable spring door hinges have specific adjustment points. These are typically located on the hinge body or the spring itself. Refer to the manufacturer’s instructions for your specific model to identify these points clearly.
- Adjust the Tension
Using your screwdriver or Allen wrench, begin adjusting the tension of the spring-loaded door hinge. To increase tension (and make the door close faster), turn the adjustment screw clockwise. Conversely, to decrease tension (and slow the closing speed), turn the screw counterclockwise. Make small adjustments and test the door’s closing action after each change.
- Test the Door
After making adjustments, open the door fully and let it close on its own. Observe the speed and force with which it closes. Ideally, the door should close firmly but not slam. If adjustments are needed, repeat the tension adjustment process until you achieve the desired closing speed.
- Ensure Proper Alignment
Check the door’s alignment within the frame. If the door is not properly aligned, it may not close securely, regardless of the hinge adjustments. Use a level to ensure the door is straight, and adjust hinges or shims as necessary.
- Apply Lubrication
If the hinges are noisy or stiff, consider applying a lubricant to the hinge pin and moving parts. This will enhance the smooth operation of the spring-loaded door hinge and prolong its lifespan.
Conclusion
Adjusting spring-loaded door hinges is a straightforward process that can significantly improve the functionality and safety of your doors. By understanding how to work with adjustable spring door hinges, you can ensure that your doors operate smoothly and securely. Regular maintenance and adjustments will not only enhance convenience but also extend the life of your door hardware. With the right tools and a bit of patience, you can maintain your spring door hinges for optimal performance, ensuring they serve you well for years to come.