
Concealed door hinges, often referred to as hidden door hinges, are an innovative way to enhance the aesthetics of your doors. These hinges are designed to remain out of sight when the door is closed, offering a sleek, modern look. Installing concealed door hinges can seem daunting, but with the right tools and guidance, anyone can achieve a professional finish. In this article, we will explore the step-by-step process of installing concealed door hinges, while highlighting the benefits of using hidden door hinges.
What’s Concealed Door Hinges
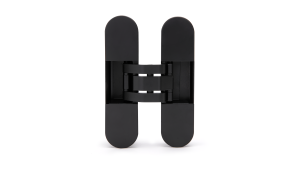
Concealed door hinges are a type of hinge that is installed within the door and the frame. Unlike traditional hinges, which are visible when the door is closed, concealed hinges provide a clean appearance. This feature makes them particularly popular for modern designs, where minimalism is key. Hidden door hinges are also known for their durability and ability to support heavier doors, making them an excellent choice for both residential and commercial applications.
Tools and Materials Needed
Before beginning the installation, gather the following tools and materials:
- Concealed door hinges (specific to your door type)
- Drill
- Chisel
- Screwdriver
- Measuring tape
- Level
- Wood filler (if necessary)
- Sandpaper
Having these tools at hand will streamline the installation process and help ensure a successful outcome.
Step-by-Step Installation Process
- Measuring and Marking
Begin by measuring the height at which you want to install the concealed door hinges. Typically, hinges are placed about 7 inches from the top of the door and 11 inches from the bottom. Use a measuring tape to mark these points on both the door and the frame.
- Chiseling the Mortises
Using a chisel, create mortises at the marked locations on both the door and the frame. The mortise should be deep enough to accommodate the hinge’s thickness. Ensure the edges are clean and even to allow for a snug fit.
- Installing the Hinges
Once the mortises are prepared, position the concealed door hinges into the mortises. Use a level to ensure they are aligned correctly. Secure the hinges in place with screws, making sure not to overtighten, as this can damage the wood.
- Attaching the Door
With the hinges installed in the frame, it’s time to hang the door. Lift the door into position and align the hinges with their counterparts. Secure the hinges to the door frame using the provided screws. Check that the door swings smoothly and aligns properly within the frame.
- Final Adjustments
Once the door is hung, test its movement. If adjustments are needed, most concealed door hinges come with built-in pivot points that allow for slight repositioning. Make any necessary tweaks to ensure the door operates smoothly.
- Finishing Touches
If any wood filler is needed to conceal screw holes or imperfections, apply it now and sand down for a smooth finish. This step will enhance the overall look of your installation.
Conclusion
Installing concealed door hinges can transform the appearance of your doors, providing a sleek and modern aesthetic. By following the steps outlined above, you can successfully install hidden door hinges and enjoy their practical benefits. Not only do concealed door hinges offer a refined look, but they also provide strength and durability for various door types. With a little patience and the right tools, you can achieve a professional result that elevates your space.
By incorporating concealed door hinges into your home, you not only enhance the visual appeal but also embrace a functional design that stands the test of time.